Wednesday, June 29, 2011

BoBunny Challenge

I'm on a BoBunny kick, if you haven't noticed.  I've taken on their latest challenge:  Friday Challenge  of mimic an advertisement for a layout.  The ad I found was in Scrapbooks, Ect.  for Fancy Pants.


Now here is my take on the design: 


I cut the word on my Cricut, then glitzed it up a bit.


Some pieces were blocked together like a puzzle, similar to the ad.  It also was glittered.


A star was cut out of a fun patterned paper & placed on ribbon.  Don't be afraid to stick things ON your photos!!!


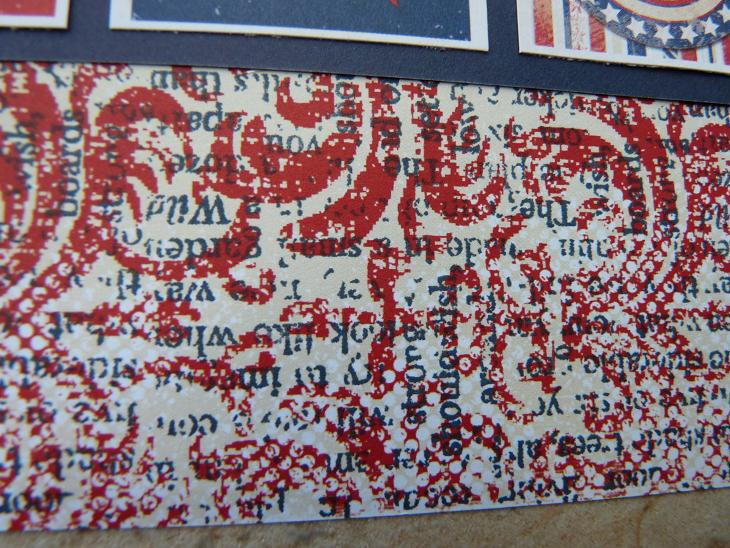
I stamped across the bottom with a background Close To My Heart acrylic in Denim colored ink.  It's a jumbled word square, somewhat aged looking.


Trying to mimic the ad, I added two journal jots.  The brads were a cute touch to draw attention!


The final touch was a flag looking tab, with fake stitching.


I have one more post in patriotic colors, so check in before the holiday!

Tuesday, June 28, 2011

BoBunny "AMERICA" Banner

I finally have something significant to post!  I've been busy working, gardening, fishing and all that summer stuff!  My baby turns 3 in a few days, so the Fourth of July holiday is so fun to decorate for! 

I restocked on the BoBunny Liberty line, which seems to have the best colors for the holiday.  Sometimes they're too bight or too dark.  Liberty=perfect!

I dug out the white chipboard banner from my *fabulous* Close To My Heart consultant Donelle !!! Now, I'm FINALLY getting around to using it.


                              I embossed white & red on some chipboard flourishes.


The circle paper clips are Close To My Heart. The pretty star pin is Maya Road.  My sister & I split a package of them!

 I ran some cardstock through my paper crimper.

     I used a starburst punch & gems to glam up a WeRMemory Keepers Glitter Lace sticker border.

I added gems to old buttons with an incredible result!  They look just like Webster's Page's Sparklers!!!

I used some embossed flowers, then layered them with punched flower & gems.
The rest was just "good old fun" with patterned paper!


Saturday, June 25, 2011

Ironing board "table"

I just got a totally cute old ironing board from a garage sale for 50 cents.  The idea of using this as extra table space was stolen from my favorite local scrap store and friend.  It can be stored flat against the wall, but in a rather cute fashion.  But when you busy working & supplies need to be spread out, just temporarily set up the ironing board.


The Rid-Jid board had many layers of horrible padding.  They were tossed away & the cutest image was revealed!


Keep in mind that scrapbooking furniture can be cute & old.  Garage and estate sales often have desks, lamps & bookshelves that work great for storing our many sized tools & supplies.


Thursday, June 23, 2011

Sympothy Saying

Just in time, I broke down and bought a thoughtful stamp saying.  It's so much easier to stamp it, then to try and write sympathetic thoughts down.  I used a Close To My Heart stamp set of birds.  They had beautiful swirls around them, but instead I just hand cut them out.


The paper is K&Co. I used less than cheerful colors.  I was pleased with the birds working out well for such a theme.  They seem kind of peaceful & angelic.

Monday, June 20, 2011

Easter 2011

We had pretty nice weather for Easter this spring.  I was blessed with a multitude of great photos! 

Sorry this photograph is so washed out.  The background is Kraft paper.  I cut the flower out of a patterned sheet of really old paper, gave it a stem, & added my circle photo.  A few tiny flower punches were run across the page.  I adds some gems & the year.  Sometimes it's good for a scrapper to whip out some easy pages.  Then you feel like you're making progress!


Sunday, June 19, 2011

Pink Archery Page

I've tried to feminize my archery photograph!  Archery & pink CAN blend together, if you make them.  The Basic Grey kit called Indian Summer worked great with leaves & a great mix of colors.


Our family is part owner & operator of a monthly 3D archery target shoot each summer.  This BIGFOOT is so much fun to set up, often holding his beef jerky (from the commercials).  It's always a good time, when I get to shoot the course with my son.


The velvet flower is by Petaloo, with a beaded center.  They're called Flora Doodles.  You might notice that I don't use a lot of expensive pre-made flowers.  This was a treat for me, just glue dot it on!  I picked the leaves off a cheap plastic cluster from Ben Franklin.  


The ribbon is Webster's Pages.  They offer an amazing variety.  I adhered this with glue dots, as you can see it's not perfectly straight.  Nobody said scrapbooking is perfect!


The buttons I just razor blade cut the backs off & added some stickers on them.


Now, a challenge to you:  Beautify any theme or page with flowers & "girlie" stuff!  It works for me!

Thursday, June 16, 2011

BoBunny Challenge

I found an easy challenge on the BoBunny blog.  They give you a layout to make & you just post your version.  It was a lot of fun with the paper I chose, called Liberty United.  I love any paper that's aged or distressed.


"Soldier" was stamped in two two colors with the Token Alphabet.  I REALLY need a circle punch for this, but hand cutting works too.  The colors of the cardstock and inks are Denim & Cranberry.  I am a huge Close To My Heart fan.  All the inks & cardstocks match.  They worked great with the BoBunny paper too!


The stars were cut on the Cricut, then sponge inked.  I also sponged the scallops along the top.  The lovely star was cut out of the B.B. paper and layered on a circle with a scallop edge for flair.


I love this photo, my son is wearing his grandpa's old Army hat.  The soldier on a stick is my cousin, he's no longer in the Army.  The phrase was a long sticker that I cut into three strips. 

Now I am in the mood to make some patriotic decorations!  I'm going to have to go back to Pine City Scrapbooking Co. and get more BoBunny Liberty line!!!

Wednesday, June 15, 2011

Enjoy Creativity

I am wondering if this title was a stretch.  But the page is done, and it turned out cute.  Sometimes when choosing a title, I try and be TOO different.  It just seems like I keep doing the same titles over & over, like "family" & "fun".  So an odd title now and then is totally acceptable!


The paper is Close To My Heart, and so are the cute little bunny stickers.  I used my new grass edge punch, which I already LOVE!  Two rows of grass, and you have an instant dimensional scenery.

In the photo below, you can see how I cut my punched starburst into frame edges.  I wanted to add "with eggs" in a decorative fashion.


The title evolved from my CTMH "ENJOY" stickers.  I really wanted to use them.  I also did some sanding on the pink cardstock arrow.  I just wanted to soften the color up a little.


The starburst punch & gems made for an explosive focal point by the title.


Thanks for looking, I hope you've gotten a few ideas from this layout!

Monday, June 13, 2011

Storage Tip

I recently got an old wooden tape cassette box.  It worked so perfectly for my stamp pads, I just have to show you!  Labeling the sides of the stamp pads makes locating colors faster.

The cost of this handy shelf... 50 cents!  The longer box underneath was a dollar, I've had that for a few years now.  It has been handy both vertical & horizontal!

Sunday, June 12, 2011

SPAM? YES!!! SPAM PAGE!!!

I took my niece & youngest boy to the Spam Museum in Minnesota.  It is a first class place, the kids loved it.  I had so many cute pictures that I couldn't widdle it down to one page.  I haven't done a "double whammy" in a while.  It's kind of fun having a bigger unit to work on!


It's really basic, with only four colors.  Sometimes, I have to remind myself that I can work on a white background!  The squiggle lines were cut on the Creative Memories trimmer.  I then combined circles & stars for a bold, basic look. 


When my sister & mom picked us up, I got a photo taken holding the spatula!  Isn't it hilarious!?


The final touch to this page was my ribbon bow!  I crafted it out of stapled loops, then bound them together with a final mini loop.  The tails are fake, just tacked them right on the page.


Wednesday, June 8, 2011

Edge Punch Technique

I'm going to show a technique, that I picked up via idea galleries online.  It may be new to some of you.  I call it "ruffles".


I used a Fiskars edge punch and cut it into narrow strips.  Next, gently started to pleat fold it into a gradual arch.  The goal is an oval shape to frame my 5x7 photo.  This technique is very forgiving, so mistakes are easily refolded or undone.


The photograph is already cut to size & matted for extra strength.  I continually set the photo on top of my oval to make sure it'll stick out around the edges evenly.


I used double stick tape to adhere my two strips of edging together.  Once added to the scrap page, I fill the inside with 3D dots so my stiffly matted photo can sit up and above all those folds. 


This page came together nicely!  I used some gold ribbon made of hard flowers.  Glue dots worked well to place them on.  They really added some class to the layout.


I did some multi-tone stamping in the void up top.  The Easter was cut on my Cricut & I filled the negative space with cute music note paper.   The papers, "Celebrate" tag, and velvet ribbon are all Webster's Pages.


This photo is of my son & my hubby's cousin's kid.  It's cute because Jason & his cousin spent a lot of time together when young.  It'll be so fun to see these two hang out  together through the years.